
.avif)

Ecommerce is set to rise exponentially in the coming years, as per research by Morgan Stanley. The eCommerce market will grow up to $5.4 trillion in 2026. Of course, this could mean more competition and more profits too.
So, the question is, how do you stand out from the competition and remain profitable?
You need a highly intuitive and scalable Webflow E-commerce store that you can build fast and start selling. In addition, the store must cater to your industry requirements and serve exceptional customer experience. Webflow for ecommerce is one platform that perfectly fits the bill.
Webflow offers the full power of HTML, CSS, JavaScript, and Vibranium to build spectacular, scalable, and immersive solutions ecommerce on Webflow. Webflow has recently unveiled new Webflow e Commerce features as well to serve eCommerce store owners.
Initial Steps: Setting Up Ecommerce on Webflow
But, building an Webflow ecommerce store can be overwhelming for anyone. So, you first need to figure out the needs of the market. Then, you research suitable products and figure out your positioning in the market as opposed to your competitors.
You can either manufacture the product yourself or be a reseller. The last steps are managing logistics and packaging for your products.
If you offer digital services instead, you can do away with packaging and logistics.
After you've done your homework, now is the time to start building your store.
Step-by-Step Guide
Here’s a breakdown on how to build an eCommerce store using Webflow.
1. Build a Collection in Webflow Ecommerce
Your eCommerce store needs products to sell, and you can showcase those products by building a collection.

You can go to Products and add products from the eCommerce panel manually. You can name the product, add a description and price for each product in your store, and press Create. You can also bulk import your products using a CSV file.
You may also need to organize these products into categories. You can add Categories from the products page. Alternatively, you can go to the Categories panel in the eCommerce store and create new categories first and later add products. Finally, you can import and export products.
It's also possible to add custom fields to each of your products. These fields can range from rich text to references to links. This makes it easier for you to describe your product aptly. Plus, it's easier for your customers to get a complete picture of your product at a glance. You finally save the Collection.
2. Customize Your Webflow Ecommerce Cart Button
After adding products, it's time to enable shopping by adding a Webflow shopping cart button. Webflow allows you to customize the icon, text, and cart quantity. You can start by changing the icon color per your brand guidelines. Make sure you select the icon in Navigator or Canvas. You can pick any color and change it.
You can also edit the text block to read differently instead of just saying Webflow shopping Cart.
- To display the quantity
- To display the subtotal
You can also style the cart quantity field and control its visibility on the cart button if the cart is empty. However, you can't delete the cart quantity element.
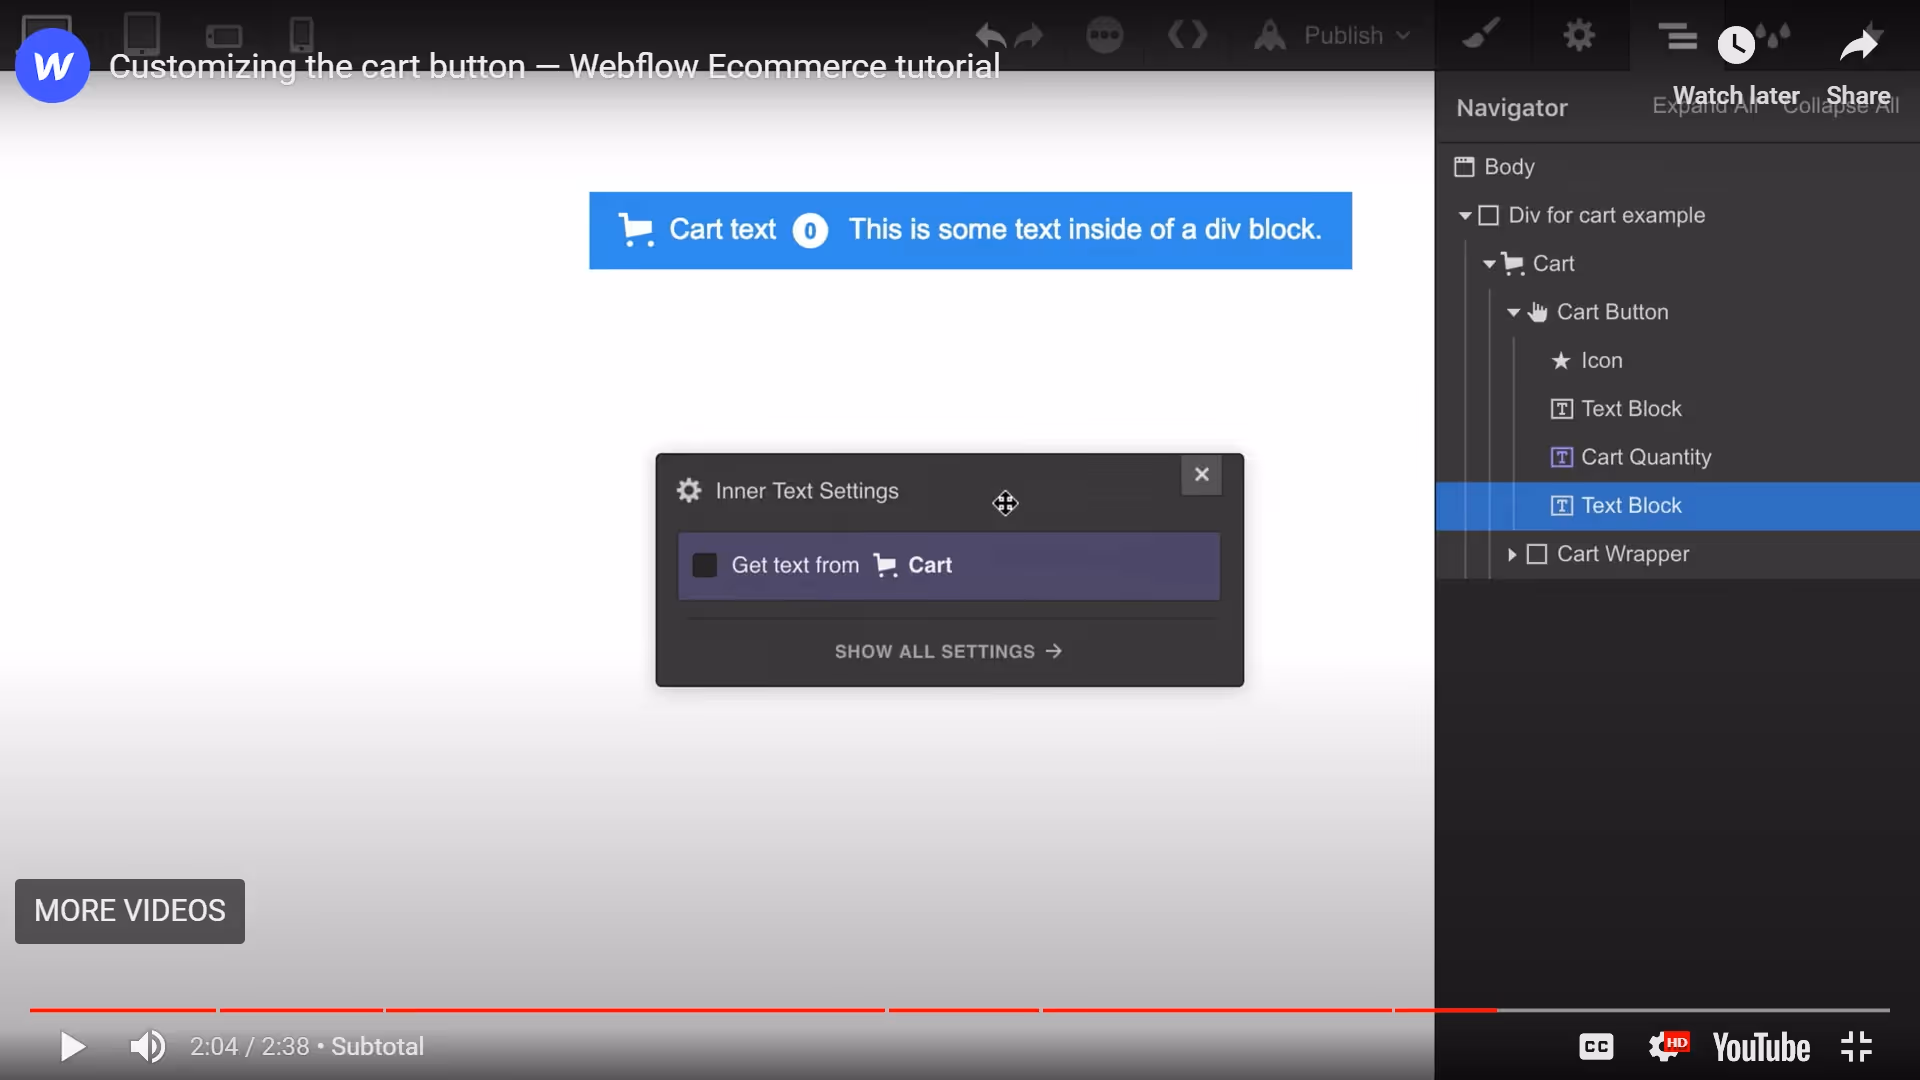
You can also add elements to the cart button. For example, suppose you want to display the cart's subtotal on the button. You can do so by adding a text block.
3. Webflow Ecommerce Integration: Add to Cart Functionality
Select the Add to Cart button from the lower navigation bar. Then, you can access the settings in the right Element settings panel.
There are three states of add to cart Button -
- Default - This is the button's default state once you add it from the Add (+) button on the left sidebar. You will see that a product variant dropdown is automatically added on the screen.
- Out-of-stock - Out-of-stock state represents when the product is unavailable. You can customize the text and the styling too.
- Error State - There will be times when an error would hamper the buying process. For instance, a product not being available for a variant. You can edit the error message and also restore the default message.
You can access the states of the cart with keyboard shortcuts of the left and right keys. The shortcut works because the states of the cart are siblings, and Webflow allows access to siblings with left and right arrow keys.
4. Create Product Variants in Webflow Ecommerce
Webflow allows you to create custom fields for products that better describe and represent the product to your customers. This is quite a useful feature, not available in many other e Commerce webflow builders. You can add options when you add a new product, together with a Name and Description. Options are equivalent to different product features.
Suppose, for instance; a clothing item will have Options like color, size, gender, occasion, etc. Once you add these Options, Webflow will automatically add variants based on these features along with a drop-down on the products page.
5. Webflow Ecommerce Emails: Customization Guide
Email marketing generates an ROI of $36 for every $1 spent. That number is higher than any other marketing channel. More so, personalized emails have a 5.7% higher open rate than non-personalized ones. In addition, you can send customized emails to your customers within your Ecommerce store without the need to integrate another ESP.
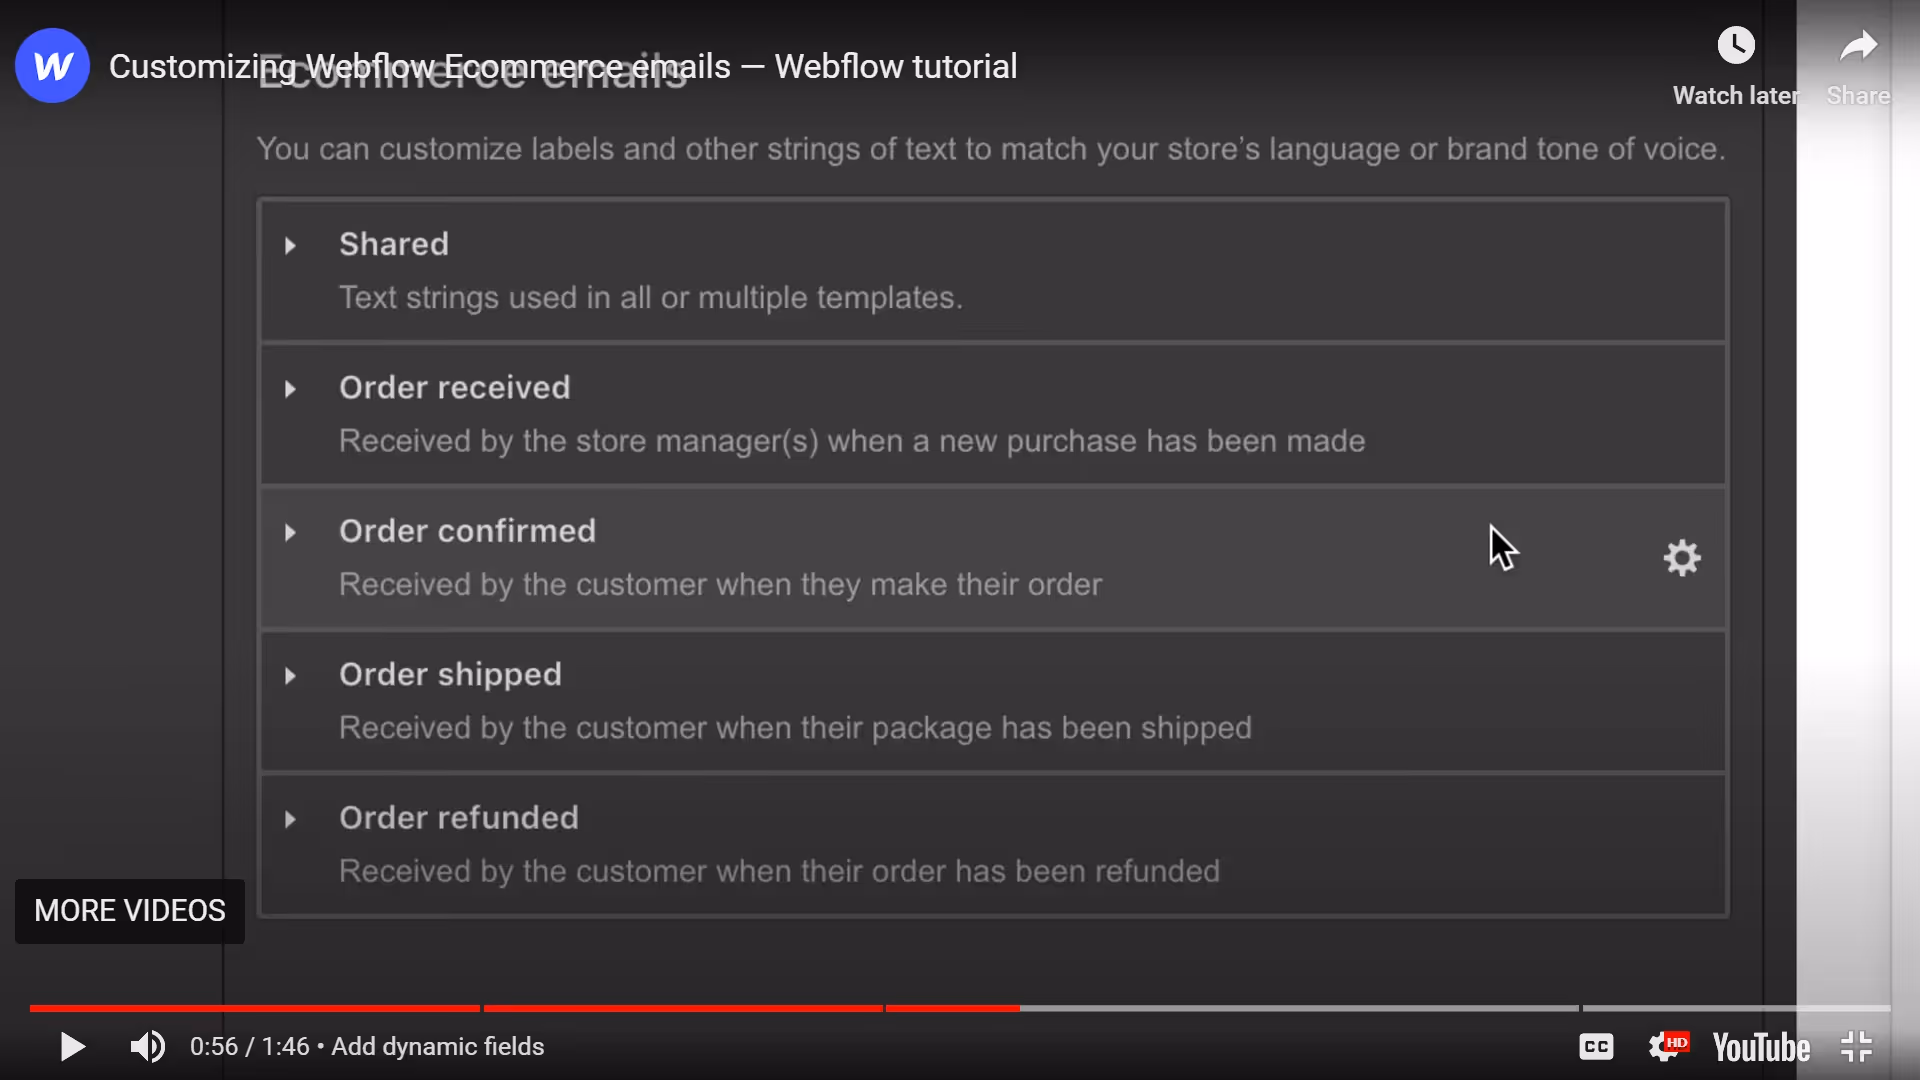
You can create branded emails by adding brand colors to background colors and accent colors. You can also add your brand's logo and hide the Webflow branding in the footer. Finally, you can add fine print text for your emails to share other details like contact.
You can add static text and dynamic fields in the email. For instance, you can add dynamic fields like customer names to personalize emails. This will help save you time even when you're mass scheduling and give you the benefits of customization.
Additionally, you can also send the Test email. However, you can also see the preview of emails while you're working on them.
6. Launch Your Store with Webflow for Ecommerce Success
Once you have created product categories, you can launch your ecommerce store in Webflow. But there are a few more steps:
- Choose site plan: Go to your Project Settings and choose the Hosting option for your store.
- Enable SSL: Under the Hosting tab, you will see a toggle button to enable SSL. You must enable this to offer secure payment processing to your customers.
- Add payment provider: Form your Ecommerce panel, access Settings, and select the Payments option. You can add Webflow ecommerce payment options such as Stripe payment methods to your store. Other options available via integrations are Google pay, Apple Pay, and Paypal.
- Enable checkout: From the Ecommerce settings, select the Checkout tab and toggle the button to enable checkout.
- Publish on webflow.io In case you need to test your store in an online environment. You can publish on Webflow.io to verify if your store is functioning optimally.
7. Webflow Ecommerce Store Design: Best Practices
The above-listed steps cover the underlying framework of the eCommerce store in Webflow. But, one important piece of the puzzle is the user interface that can make a huge difference to your eCommerce store.

After adding products, you will notice that a Product template has already been created. Therefore, you can begin by selecting the add symbols (Component) from the pages panel. Then, you can build layouts from Section, Container, and Grid elements as per your requirements.
From here on, you can use structural elements like div blocks, text blocks, buttons, etc., to contain different parts of products. And design all CSS elements like padding, margin, typography, etc., from the right sidebar in Element Settings. You can edit the Dynamic Style settings to set background images, color, etc., by pulling the same from the fields in the product collection.
The easiest way to build all your product pages is to create classes for each piece of the product page and pull data from different fields like description, price, quantity, etc.
So, in a nutshell, you only design once and bind content to class so that all your product pages are built automatically consistently.
Conclusion
Webflow offers a tonne of options to build an on-brand eCommerce store. It's an easy, fast, and efficient way to launch an eCommerce store that understands the inherent needs of modern and scalable eCommerce stores.
You can benefit from unique features like custom product variants, personalized emails, tax calculations, and so on to create an eCommerce store that's easy to manage and scale.
If you need assistance in building your eCommerce store, you can get in touch with us here.


.png "Schedule a call with Workshore Webflow agency")